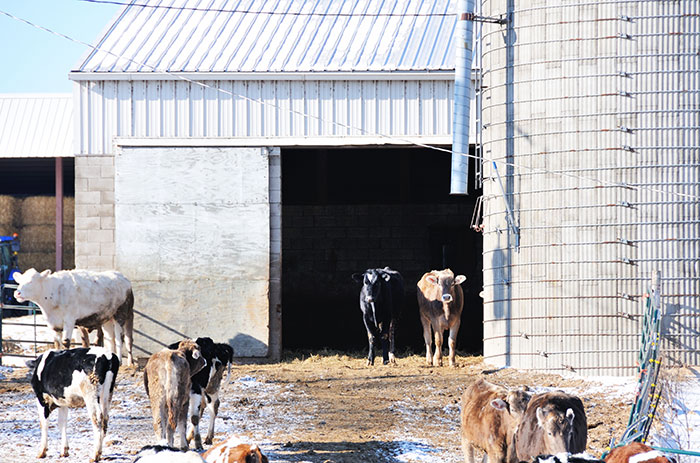
Barns are not the only place where you find sliding barn doors anymore. What started as a functional need for farmers and ranchers for a barn door that was easy to open and close to herd in livestock, has become a growing trend in interior home and office design. For these traditional barn barns cedar wood was used as the most weather resistant wood for a sliding door. Cedar, teak and bamboo are excellent choices for outdoor-rated barn door material. The most common material for barn doors is solid wood, but there are many barn doors being made out of composite woods as well as hollow core barn doors and even plywood barn doors. Building a barn door from these composites can be an inexpensive way to build your own barn door but the consequences are very costly as barn doors built without careful cross layering will bow and bend due to the fact that barn doors do not require typical door jambs that keep them true and prevent warping. When a barn door isn't built correctly it will start to pull away from the wall at different places in the door creating a wavy effect in the wood grain. This wave in the wood will eventually prevent the door from being usable as the door will no longer be able to slide along the track as the barn wood door can become lodged against the back wall. This is one of the main reasons to avoid building a barn door from composite woods and to focus on the most important features of building a barn door. Let's discuss those features.
How to Build a Barn Door
- Gather Tools and Materials
- Take Measurements
- Cut Wood Boards
- Distress Boards
- Stain or Paint Boards
- Square and Fasten Together
- Mark for Hanging Hardware
- Mount Tracks
- Install Floor Guides
- Hang the Door
- Stand Back and Admire Your Hard Work
Wood For Your Barn Door Panels
When you select wood for your barn door choose solid wood such as knotty alder, pine, cherry or oak. Mahogany is a very popular wood as well as rift white oak. This solid wood must be cut to exact lengths and widths for the door to be square. A barn door made out of square will be extremely noticeable and an eye sore hanging against a white wall.Wood For Your Barn Door Stiles and Rails
When you select wood for the "frame" of your barn door (not the interior panels or T&G but the outer wood portion of the door) it is critical that you use alternating grain, solid wood, engineered lumber. Anything else is guaranteed to warp, bow and bend which means your barn door will have to be taken apart and rebuilt. This is the most common mistake in trying to make a sliding barn door.
1. Gather Tools and Materials
Knowing what tools and materials you need is probably the most tedious part of the process of building interior barn doors. To prevent you from multiple return trips to the hardware store, here is your one-stop-shop list for information on what materials you need.First of all, you can’t build a barn door without wood. There are several places you can obtain wood, including purchasing new wood slabs that you will make look rustic or finding some old barn wood that you can repurpose for your door. Either way, you’ll end up with a beautiful barn door.
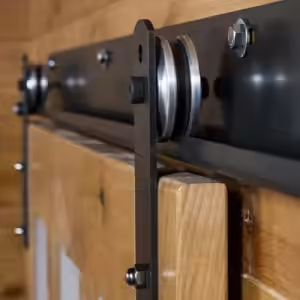
Next, you need your hardware. You’ll want to purchase a barn door hardware kit in order to ensure you have the right hanging gear that goes with your mounts and sliders.
Here are the top tools and materials you need to build a custom barn door from scratch:
- Table Saw
- Chop Saw
- Router
- Sander
- C-Clamps
- Wood Glue
- Drill
- Rachet
- Sawhorses
- Lag Bolts
- Door Screws
- Pipe Clamps
- 120-grit Sandpaper
- Stain, Glaze or Paint
- Gravity-fed Sprayer
- Polyurethane Clear Coat Finish
2. Take Measurements
Taking measurements is the most critical step in the barn door building process. You’ll need to determine how much space the door needs to cover, whether you want one sliding door or two, and if you need a bypass barn door or two doors that meet in the middle. If you’re planning on installing a single barn door, you need to ensure that you have enough room on the side of the door opening for the barn door to slide all the way past the doorway.Look at the area around the opening to check for light switches, lights, or other things that would impede the door’s movement, such as heat registers or molding that sticks out from the wall. If you don’t have enough room for a single sliding door, consider installing two smaller doors that slide together but take up half the space when fully opened.
In order to determine the space you need, measure the width of the door opening and add two inches to your total. Add two inches to both sides if you want the barn door to extend beyond the opening for maximum privacy.
Most sliding barn door hardware kits call for a measurement from the floor to the top of the door frame. It’s essential that enough space is left above the track so the door can be lifted onto it. Check with the manufacturer of your hardware to ensure an accurate measurement.
3. Cut Wood Boards
If measuring is the most critical part of the barn door building process, then this is the most time-consuming one. Building the actual door takes time, energy, thought, and precise measurements and cutting. The measurements you took for your door frame will be used in this step.Gather the wood boards you’ll use for this project. You can repurpose actual barn wood for your DIY barn door or purchase new wood from a home improvement store. Either way, you can’t go wrong, and you’ll end up with a finished product that looks stunning.
Measure and mark each plank of wood where you’ll cut. Use a hand or power saw to cut the wood to the correct measurements. Once you have all your vertical planks cut, measure the total width of your boards together and cut two more planks to serve as the top and bottom trim.
If you want to create a decorative design, this is also where you’ll want to cut your ‘x’ or ‘z’ planks that will form extra support, framing, and aesthetics for your barn door.

4. Distress Boards
If you’re using reclaimed wood, you can skip this step. If, however, you’ve purchased regular 1x6 planks from a home improvement store, you’ll want to make them look as authentic as possible. There are several ways you can go about this process.You can distress the wood with a grinder to give your boards a weathered look by using a wire wheel and flipping it parallel to the board. Take your time and wear lines into the board in the direction of the grain.
Another option is to use the grinder by holding it flat against the board and creating false saw marks. The objective is to wear away some wood and make your planks look authentic for your rustic barn door.
Pro tip: Use long nails to secure the planks when distressing instead of just a clamp.
5. Stain or Paint Boards
Depending on the barn door idea you want to run with, you should choose to stain or paint the boards. If you want a modern barn door look, a painted door will fit right in. For a rustic sliding barn door, staining after you distress the wood will give it the most authentic appearance possible.For a truly distressed, old barn door look, first apply a base stain then, once dry, apply a darker stain with a rag to form an uneven appearance. Finish the process with a final layer of grey stain to give the door an aged, weathered look.
To make this step a success, don’t worry about getting the paint or stain perfectly even or spread out. Authentic barn door wood or reclaimed wood will look uneven, so imperfections work well when it comes to creating the final product. Don’t worry if you get an uneven stain on a particular board or if paint went on thicker in some areas than others. Uneven staining or coloring only adds to the rustic look of your sliding barn door.
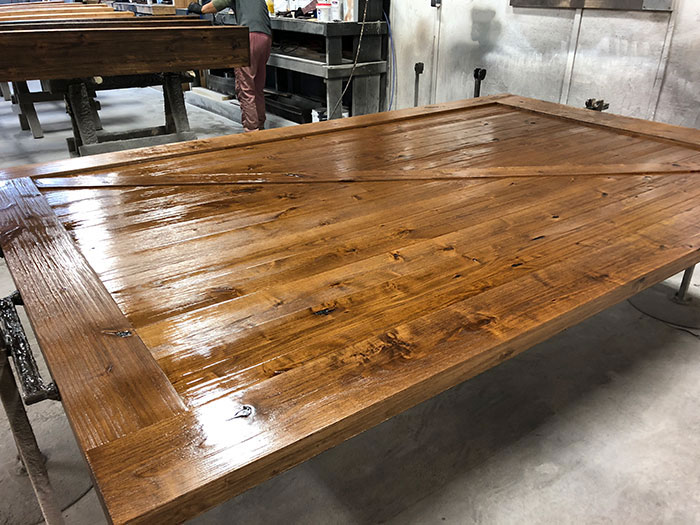
6. Square and Fasten Together
Once all the boards are pre-drilled, stained, and dried, it’s time to square them up. This is when your DIY barn door will start taking shape. Place all the boards side by side and make sure each board lines up. Measure diagonally from one corner to the opposite in a cross pattern to make sure you have the same measurement on each diagonal. The same measurements mean that your door is square.Once your wood is square, use the top and bottom trim piece to secure the vertical boards. Place a generous amount of wood glue over the boards where the trim will go, lay the trim over the vertical boards and, finally, use a nail gun to secure the trim onto the boards. Repeat this process for the top and bottom trim, as well as any decorative trim desired on your sliding barn door. An ‘x’ or ‘z’ that goes from top to bottom or even covers half of a sliding barn door adds to a rustic appearance.
At this point, you have the makings of a door, but you’re not quite there yet. It’s a good idea to get a solid grasp on how to install a barn door to familiarize yourself with the next steps.
Here are some instructions on assembling your own barn door:
- Slide A2 over so its tongue inserts into A1R's groove.
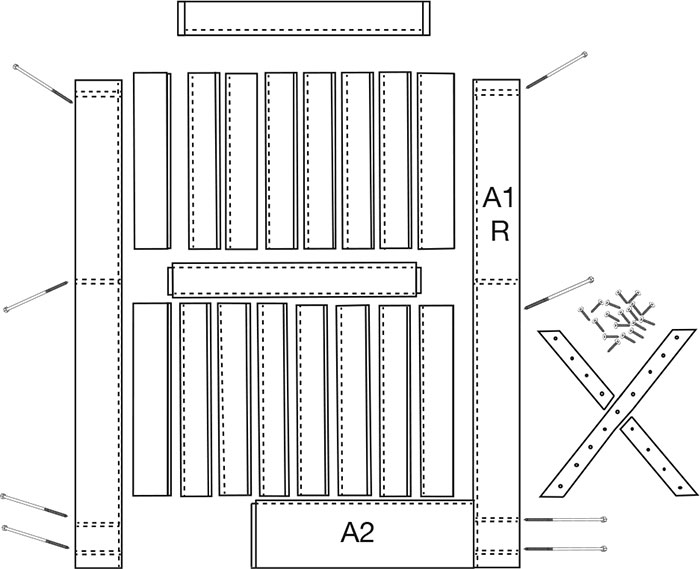
- Slide B1, B2, and B3 slats to the right and down so their tongues go into A1 R and A2's grooves.
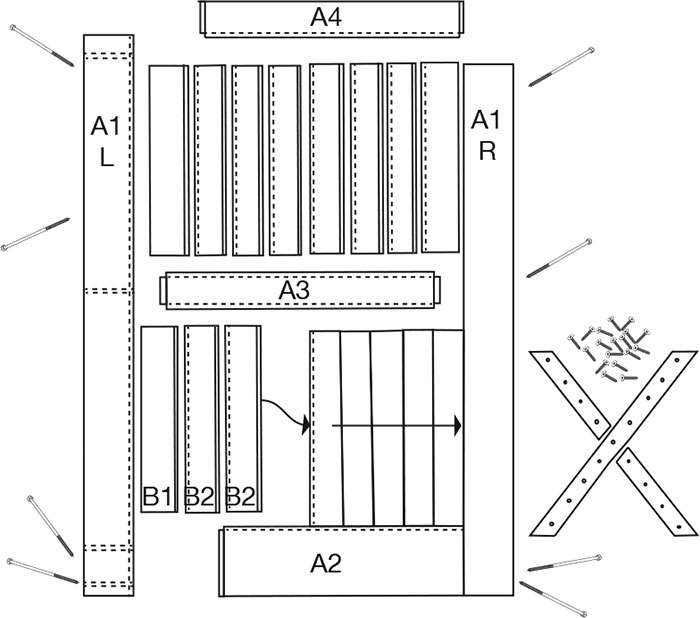
- Slide all remaining B slats into place. Now slide A3 Middle Rail down so the groove along the bottom covers the tops of the B Slats.
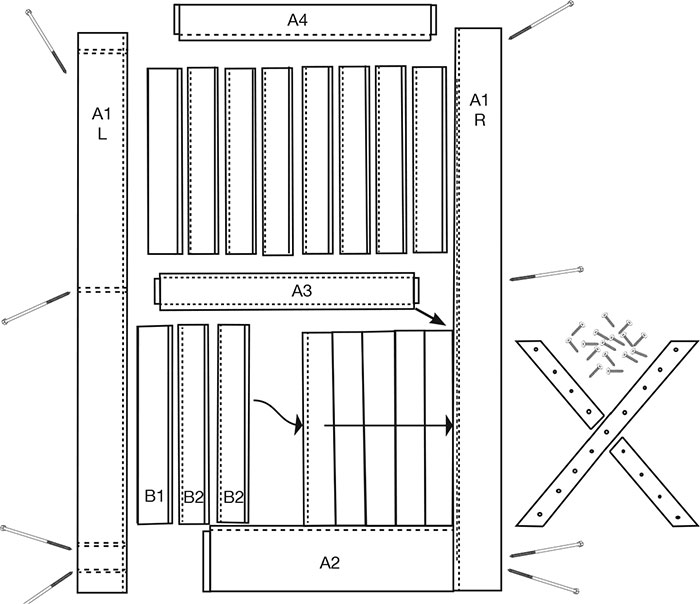
- Slide all C Slats into A1 R Stile and A3’s top groove. Once all of the slats have been positioned, place the A4 Top Rail onto the C slats and in the A1 R grooves.
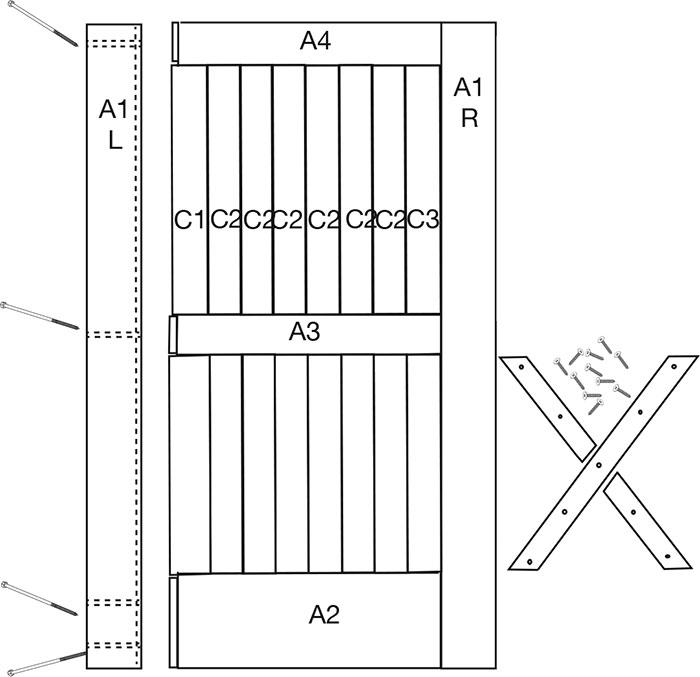
At this point it will be helpful to have someone help by holding your stiles, slats and rails firmly in place while you are installing the Lag Bolts. - Slide Side Stile A1 L into place. You can now install the 6” Lag Bolts, making sure your door remains straight. Tighten by hand, and if all slats are correctly in place, tighten with a ratchet with a 7/16" socket.
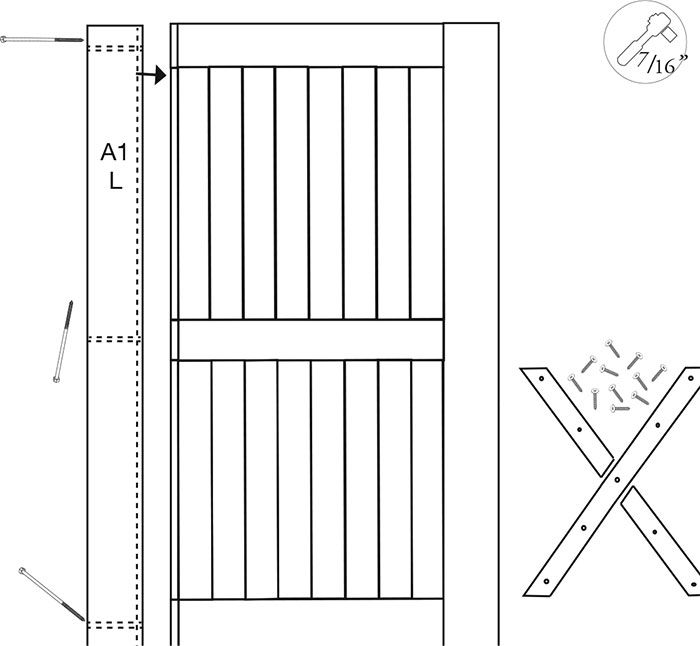
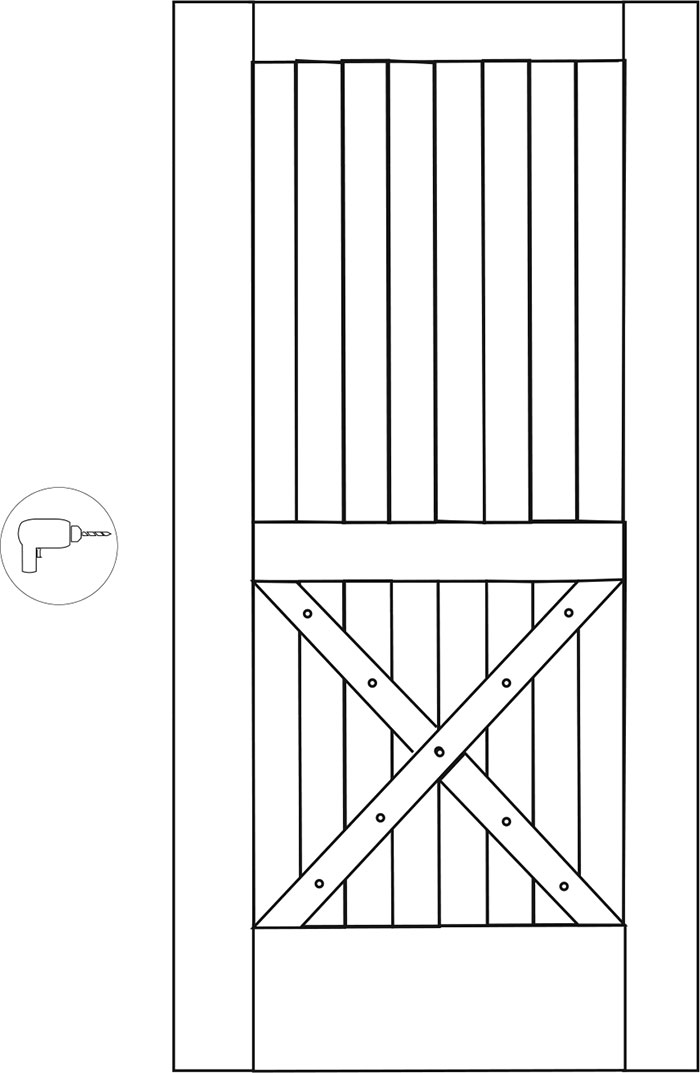
- When the Door is assembled, place A5, A6 and A7 (Diagonal Rails) onto the door so the predrilled holes are facing up and so they form an X that runs from corner to corner. Attach using the 1-1/4" Grabber Screws and a drill with a Phillips bit. Install a Door Pull and your Door is ready to hang.
7. Mark for Hanging Hardware
Mark the areas on the wood where you’ll be drilling pilot holes for your hanging hardware. Every barn door hardware kit comes with specific instructions for this part, so it’s essential to read through the manual carefully before committing your door to nail holes.Once you’ve got your holes marked, drill pilot holes for the bolts and, finally, mount the hangers onto the door.
8. Mount Tracks
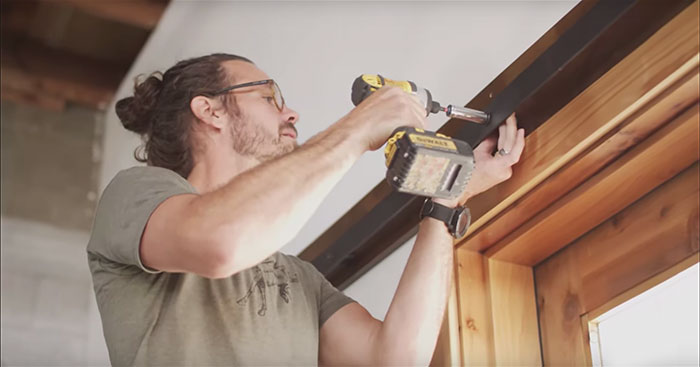
Mounting can be a tricky part of completing your DIY barn door. Unless you’re building your door as part of a complete renovation, you will either mount it on a header board or install and bolt directly onto the wall studs.If you’re using a header board, you can proceed to mark holes and bolt the track onto the board. Again, consult any instructions that came with your hardware kit. There will likely be specific instructions provided to help you hang it at the right height. You don’t want to undo the bolts and rehang the track because of a half-inch oversight.
If you’re planning to mount directly into the studs, then you’ll need a stud finder to locate and mark them. Mark the stud locations on your track to drill holes for mounting screws in the right places. Check and double-check when completing this step. The track must be mounted into the center of the studs for maximum support.
For those with little space above the door, you might consider installing a ceiling mount. Similar to a mount that uses wall studs, a ceiling mount will use the support beams in your ceiling to fasten the mount. It’s always best to talk to a general contractor to ensure that your desired mount will work in the space you have.
9. Install Floor Guides
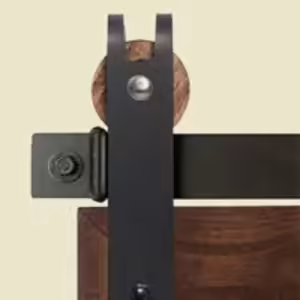
Once you’ve reached this step, you’re nearly ready to hang your brand-new barn door. If you hung it right now, however, your door would flap around and could even come off the track. This is where floor guides come in handy. After installing floor guides, your door will open and close without swinging.Floor guides are as simple as an L-shaped bracket that mounts to the floor. The bracket has an adjustable wheel that acts as a roller guide that can be adjusted to the exact width of your door. Once installed, the guide can be adjusted if you ever need to remove the door, rehang the door, or want to replace the door with one that is a different thickness.
10. Hang the Door
This is the moment when all of your hard work finally pays off. Grab a helper and carefully place the door onto the track. Make sure that the wheels are centered. Next, test how well the door rolls. It should be smooth, whether you roll it front or back. A door that jerks or stops when moving is a door that has something wrong with the mounting hardware. Finally, if the sliding mechanism works as it should, roll the door to each end and decide where to place the stops. Mount the end stops so that the door panel won’t slide off the rail. Line the door up with the floor guide and adjust the roller to hold the door securely in place.11. Stand Back and Admire Your Hard Work
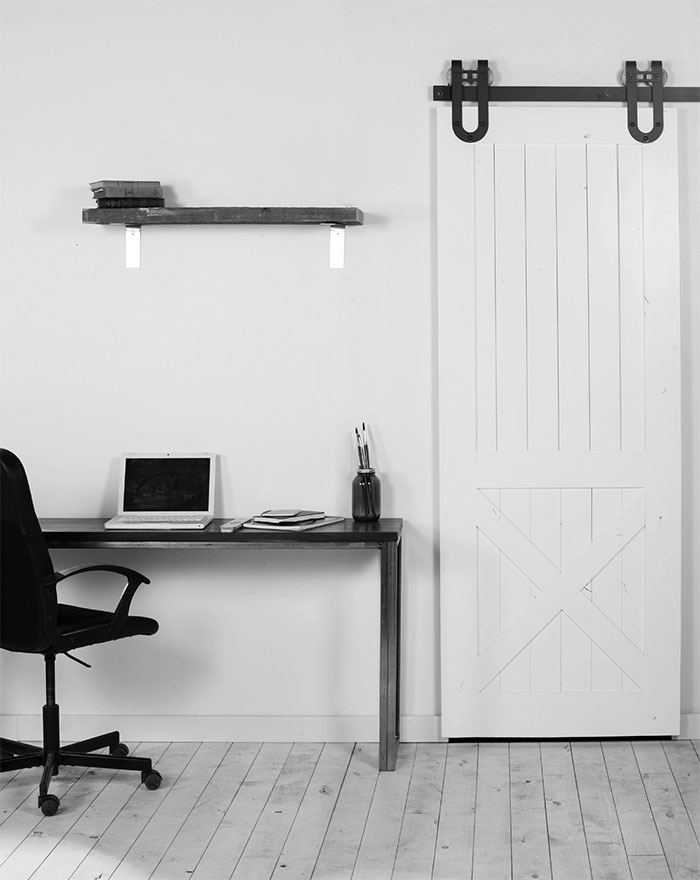
Congratulations! You have successfully built your very own sliding barn door. These make perfect additions to cover a laundry room opening, a closet door, or anywhere in your home where a sliding barn door is desired. Though slightly time-consuming to DIY, the reward and payoff are well worth the work and time spent to gather your supplies, measure, cut, glue, nail, and mount the door.You now have a beautiful sliding barn door hanging in your home, complete with floor guides and door stops. When finished, your door will be safe for everyone to use, provide privacy for any room it covers, and add a show-stopping piece of functional décor for your home.
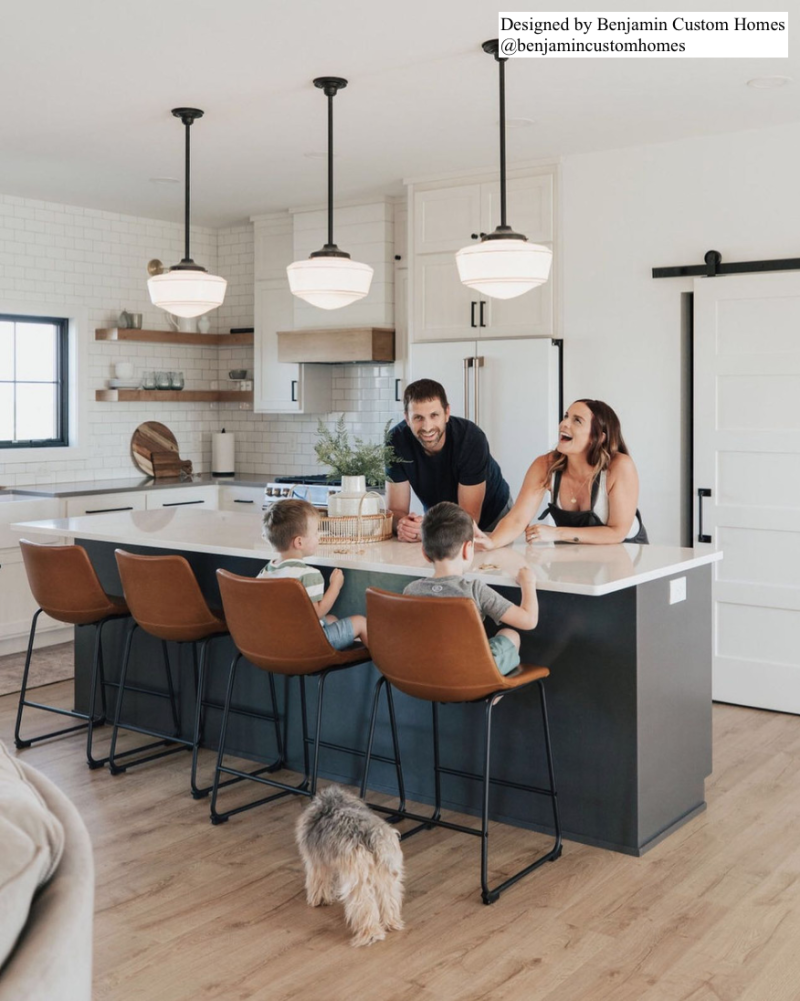
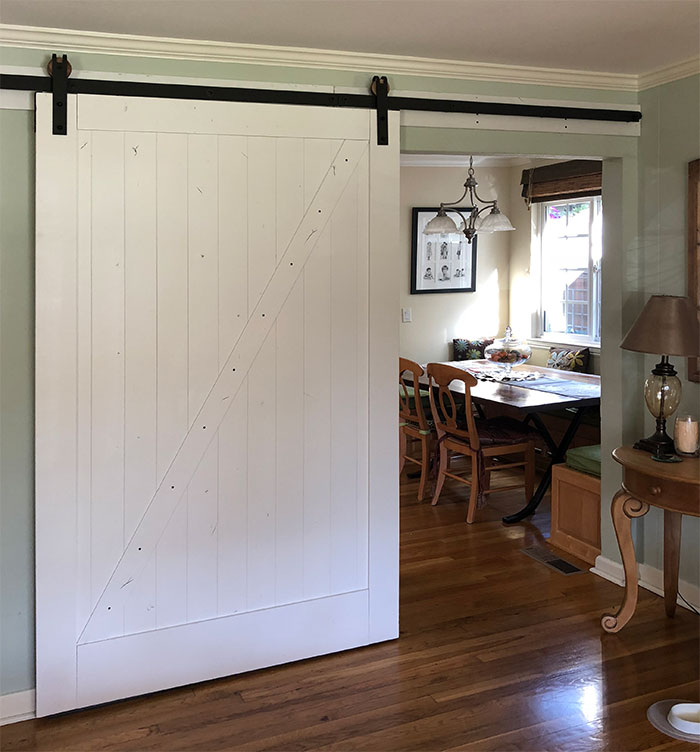
If you choose to make a barn door please submit your creative ideas to us at Rustica.com and join the barn door revolution! We love to see custom built barn door ideas. We are also a great resource for any questions you have about building your very own barn door from scratch. To speak to one of our designers about your door project call us at 1-800-891-8312. Our instructions guide link is also a great resource. Click here to view all of our instructions.

 800-891-8312






-1601395521090.avif)
